|
|
|
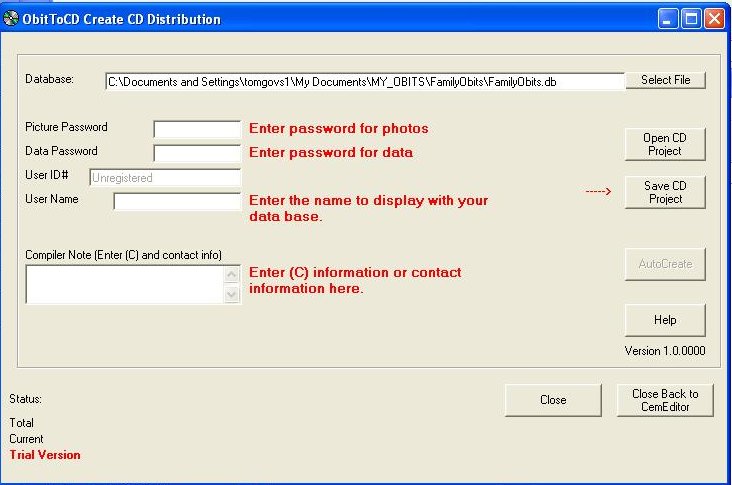
Help Final Steps In Publishing Your ObituariesStep 1 - Checking For Mistakes Comments and QuestionsUsing the Report Tab look open questions "?" report and comments "!" report. These reports will list any data that you may want to edit again. See Editing and Adding Data for tips on uses of the "?" and "!" Tags. Look over your records for accuracy etc... Step 2 - Making The CD DistributionUse the ObitToCD to automatically create CD and DVD distributions. Once the distribution is created use CD or DVD burning software to copy the contents of the distribution folder to the CD or DVD.
Click on image for larger screenshot.
Step 3 - Burning the CDThere are a variety of programs available on the market to write to CDs. These instructions will list the files that need to be put on a distribution CD or DVD. There is an example of Pre-Distribution and Distribution Files located on your CD. Windows XP has it built in. Google for "CD Burning Software" there many programs listed. Files To DistributeThe ObitToCD create the files to distribute automatically. The information below is presented for users that may want to manually change a file.
This is a list of the files, their extension, and
where they need to be placed on the CD or
directory/folder. D:\ --- SomeObituaryName-P.db (File) --- Starter.BOX (File) --- Publish.TAG (File) --- IMAGES (FOLDER) -------- Picture1.enc (File) -------- Picture2.enc (File) -------- etc... ---SETUP (FOLDER) -------- Setup.exe (File - The OVSViewer Setup) Other files may be included, but the above are the minimum necessary for the OVSViewer Application to work correctly Note that the pictures you distribute MUST have the ".enc" file extension.If you want to include the JPG or BMP files that is ok too, but the ENC files must be present for the OVSViewer to read them correctly. The regular pictures can be included too but the ENC files must be present Note that the database you distribute has the "-P" in its name.This database has been Password Protected. The password protected database must also be included with your distribution for it to work correctly. The database without password protection can be included with your distribution but the OVSViewer will not open it. Note Starter.BOX and Publish.TAGThe ObitEditor will automatically create these files for you. They must be included for the OVSViewer to work correctly.OVSViewer Setup FilesYou MAY distribute the OVSViewer Setup files with your Transcriptions either in a folder called setup or on a disk of its own. You MAY NOT distribute the ObitEditor Application Setup Files with your transcriptions.To insure you are distributing the most current OVSViewer files you may download an copy from the update page. The OVSViewer Setup.exe must be included with your distribution either on the CD containing the Obituary database or on a separate CD. The setup.exe is required for installation of the OVSViewer. See the Example distribution on your CD. If you choose not to include the setup.exe than instructions should be given on how to download a copy from out web server. The files created with the ObitEditor need the OVSViewer installed to be used on your distributions.Test Your FilesPut your final CD in the CD drive and open it using the OVSViewer. Test it. Congratulations! You have published your obituaries. |
|
|
|
Copyright 2004-2026 OVS-GENEALOGY OVS TAG
Contact: support@ovs-genealogy.com
To receive replies make sure to allow email from this address in your email filter
www.ovs-genealogy.com