|
|
|
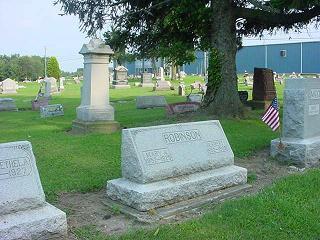
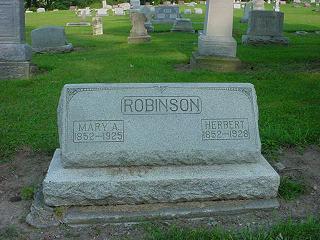
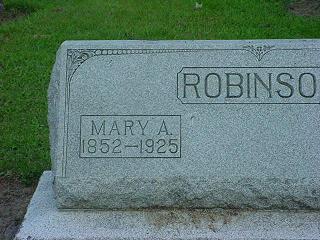
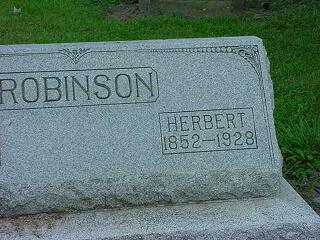
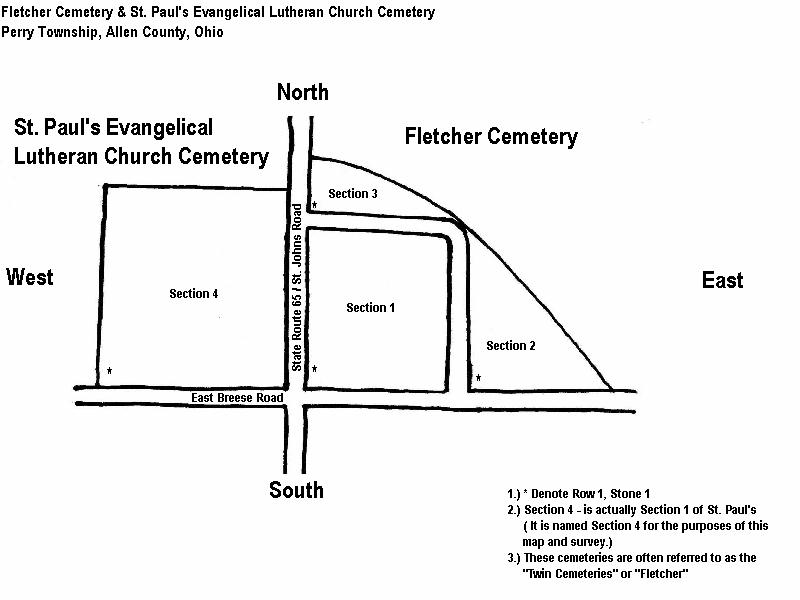
Taking Photos of Cemeteries, Monuments, and TombstonesDigital photography has made the preservation of cemeteries, using pictures, affordable. Many people are now adding pictures to their transcriptions. Many of these older stones that are still legible enough to transcribe may not be in another 15 to 20 years. By capturing these monuments in photos now, future generations will be able to read these monuments. If you are just beginning we have a list of recommended pictures to take. You may have other picture angles and views you prefer, but we still recommend that the pictures listed below are taken to capture the information on the stone and the placement of the stone in the cemetery. Take as many photos as you need. Generally, information that is difficult to read in person will not be any easier to read from a photo. When in doubt get a close-up photo. It's usually better to have a picture you don't need than to need a picture you don't have. Monument PhotosGetting Organized: Sections, Rows, MonumentsBefore taking the first photo; plan the sections, rows, and stones that will be photographed. Be consistant and complete each row from beginning to end proceeding row by row and section by section. Take a photo of the ground at the end of each row indicate the end of one row and the beginning of another. A small chalkboard or dry erase board with the section and row written on it work well too. When beginning a new section snap a few pictures of the entire section along with a picture of the sky or the dry erase board with the section information written on it. Recommended PhotosIf there is no information on the back or side of a tombstone then the back and side snapshots can be omitted.
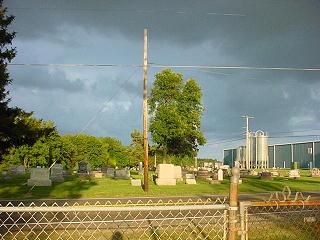
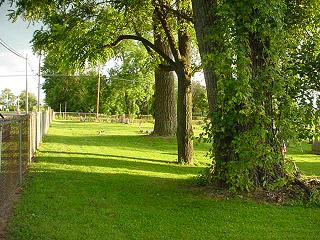
Additional Photos & TechniquesOn the older illegible stones using the camera negative setting may improve your ability to read the information when viewing them. If you camera does not have this setting you can still change a picture to a negative with many of the photo editing products available today. Take pictures on this setting when the stone is very difficult to read. Even the best photos will be unable to produce legible photos of some of the older stones. Many of the older marble stone's inscriptions fade with time. We recommend cornstarch baby powder. Cornstarch is natural and will rise off easily with water. Sprinkle some of the cornstarch on a cloth and lightly dust the inscription. The inscription will stand out like the stone is new again. Rinse with water when finished. Cemetery Maps and ViewsMaking a simple map and taking pictures of entire sections, signs, and other distinctive features of the cemetery will help others who have never been to the cemetery orient themselves without being there. Recommended
CemEditorThe CemEditor cemetery transcription easily organizes photos and transcriptions into a searchable database. |
|
|
|
Copyright 2004-2026 OVS-GENEALOGY OVS TAG
Contact: support@ovs-genealogy.com
To receive replies make sure to allow email from this address in your email filter
www.ovs-genealogy.com