|
|
|
HelpVersion 2: Importing DataCreate a new database and CSV file Importing the CSV FilesUsing the CemEditor Program:From the upper right had side of the CemEditor screen, click on the "CSV Import / Export" tab.
The image below is for the CemEditor Version
2.0.0005 and above. To see screenshot of previous
version -
click here.
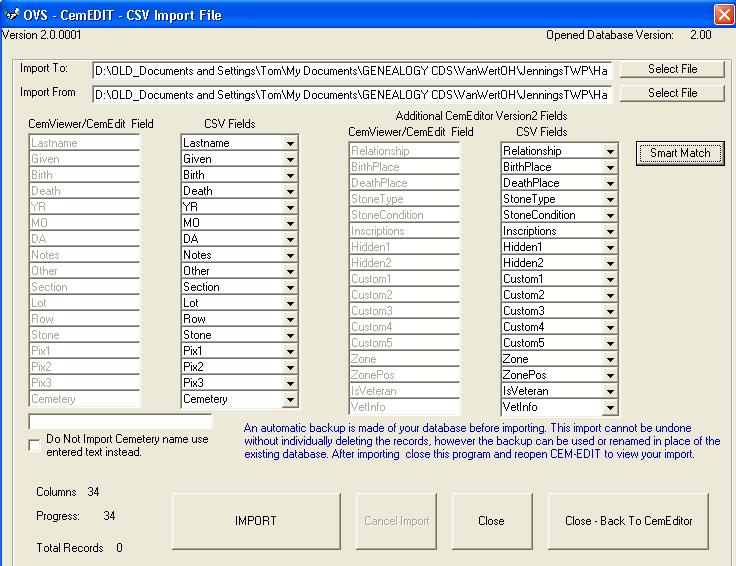
Importing TranscriptionsPrepared for importIf you have prepared your CSV File already Click on the "Open For Import (Transcriptions)" button on the "Import/Export" tab of the CemEditor.
This screen will display: Importing
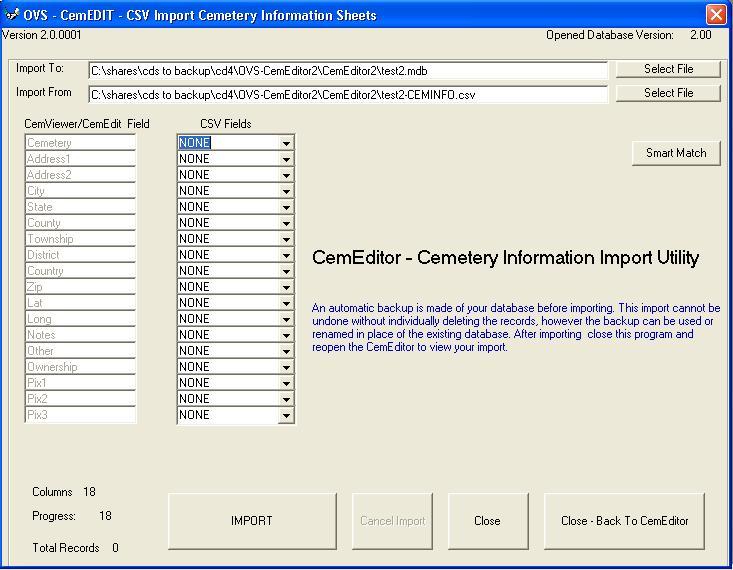
NotesTake note that after importing into a new blank database the very first record of the database will be blank. This is normal and the blank record may be deleted in the CemEditor. All of your data will follow. If you would like to see the data sorted in the CemEditor in the order that it was imported you will need to select the "No Sort" option in the CemEditor Importing Cemetery Information SheetsPrepared for importIf you have prepared your CSV File already Click on the "Open For Import (Cemetery Info)" button on the "Import/Export" tab of the CemEditor.
This screen will display: Importing
NotesTake note that after importing into a new blank database the very first record of the database will be blank. This is normal and the blank record may be deleted in the CemEditor. All of your data will follow. This imported information can be viewed in the CemEditor by double-clicking on the Cemetery Field. |

|
|
|
Copyright 2004-2026 OVS-GENEALOGY OVS TAG
Contact: support@ovs-genealogy.com
To receive replies make sure to allow email from this address in your email filter
www.ovs-genealogy.com